
Introduction: why use an Evaluation License in a Lab?
An evaluation license is especially useful for a lab because it provides a realistic environment for learning and testing without requiring a permanent production license. With the one month evaluation period, you can experiment with the relevant Check Point functionality, test different configurations, and document the results before deciding whether a permanent license is required.
You can always generate a new evaluation license once expired.
1. Generate central licenses using the SMS IP for both gateways
The User Center (usercenter.checkpoint.com) is the portal tied to Check Point contracts and product registrations. Create or log into a Check Point User Center account. A personal or company email is enough to register for evaluation purposes.
From the user center section Try Our Product >>> Product Evaluation >>>> select the All-In-one-Evaluation
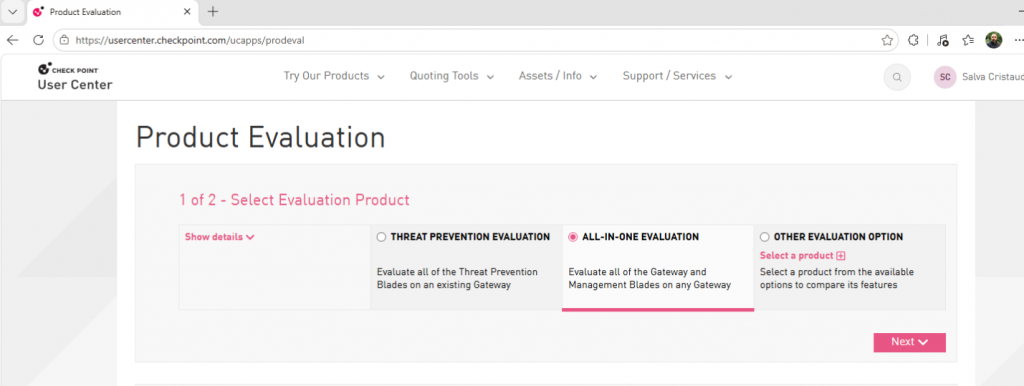
On the evaluation Info, you must provide your User center account and the SMS IP Address:
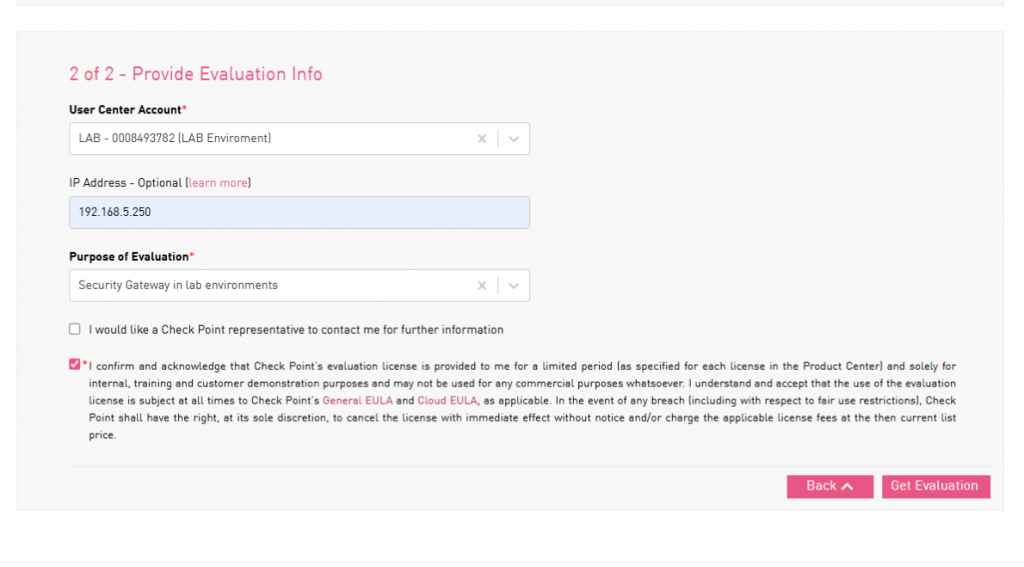
Then you can start with Get Evaluation and download locally the first license file (.lic). Repeat the same steps for the second license.
2. Adding and Attaching the Licenses via SmartUpdate
2.1) Open SmartUpdate
SmartUpdate manages the license repository and attachment for the SMS and all managed gateways. In current versions it’s opened from within SmartConsole.
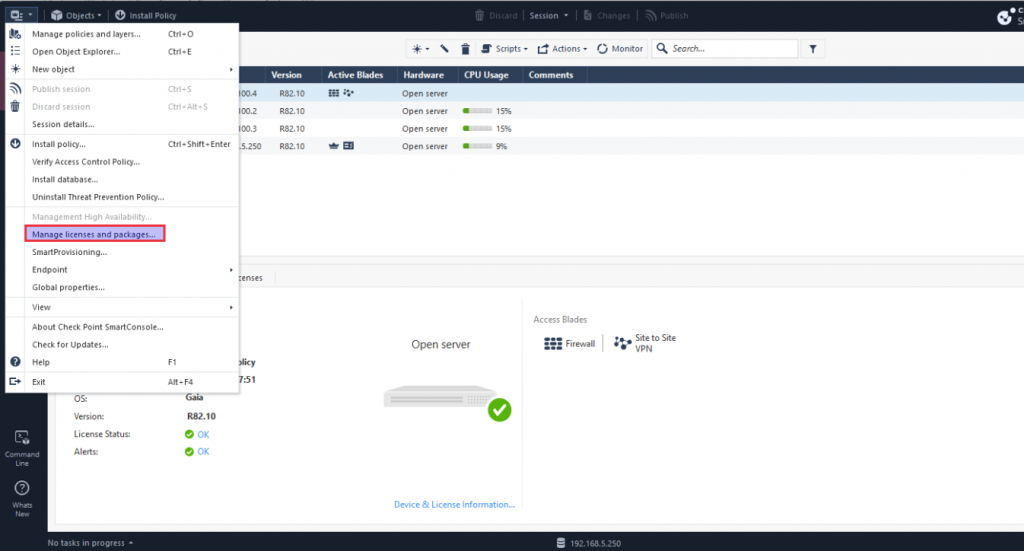
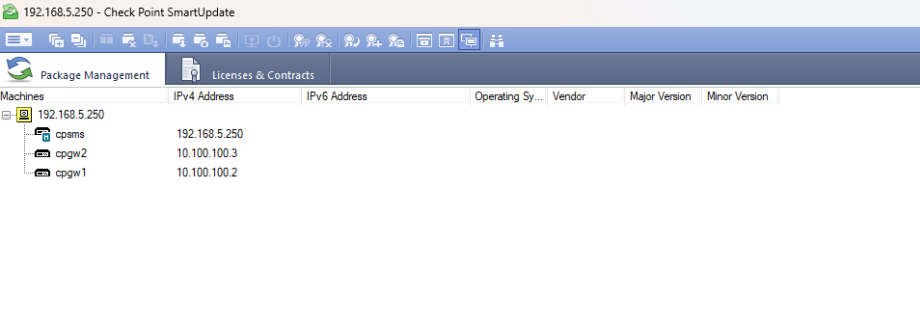
2.2) Add the license files to the repository
- Switch to the Licenses & Contracts tab.
- From the left Menu: Licenses & Contract → Add License → From File. import each local .lic files for the two gateway members.
- The imported licenses appear in the repository, unattached, showing their SKU, bound IP, and expiration date.
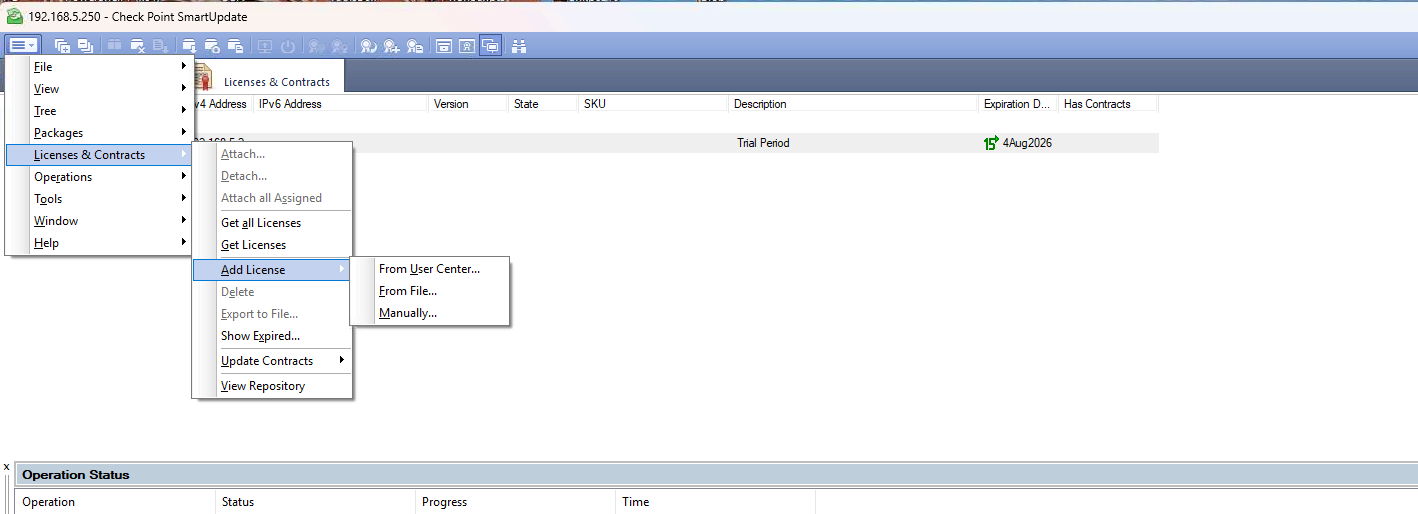
2.3) Attach each license to its gateway object
- Select a gateway object (e.g., cpgw1) in the Machines pane.
- Right-click → Attach License (or use the toolbar action). This opens the Attach Licenses dialog, listing the available unattached licenses in the repository, matched by SKU and IP (first screenshot below).
- Pick the correct license for that gateway from the list and confirm the attachment.
- Repeat for the second gateway (cpgw2), attaching its own license.
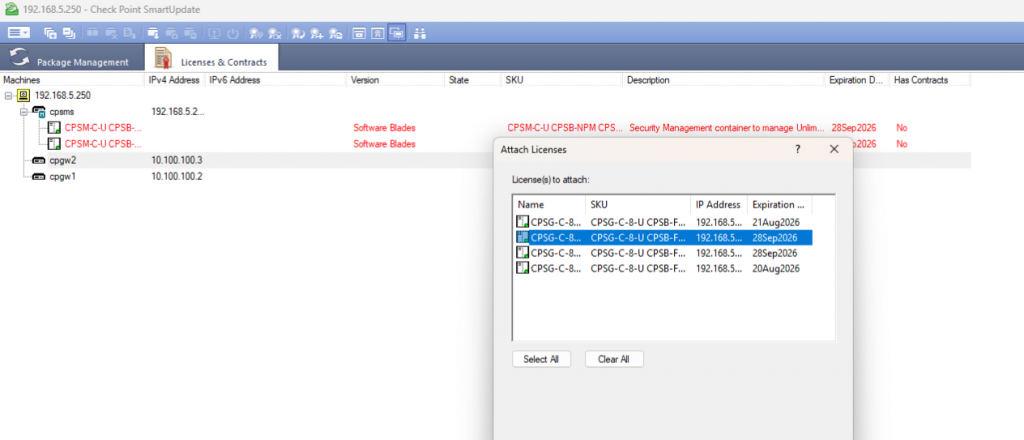
After attachment:

It’s normal for the SMS to show two attached license lines rather than one. This typically happens when the management license is split across two contract/SKU lines (e.g., covering different blade groups or renewal periods) rather than being a sign of a missing or duplicate license. Each gateway, by contrast, normally shows just one attached container license covering all its blades.
3. Checking License Status
Once the two gateway licenses are attached, verify everything registered correctly.
3.1 Smartconsole:
Smartconsole needs more or less 10 Minutes to synchronize the new licenses after attachment.
- Go to Gateways & Servers in SmartConsole.
- Double-click Cluster Member 1 and Cluster Member 2 individually → check the License tab. Confirm:
– Status shows Valid / OK (not “Expired,” “Not Attached,” or “Evaluation”).
– Blades listed match what was purchased.
– Expiration dates match your contract. - Do the same for the SMS object, just to confirm its existing license is still valid and not close to expiration.
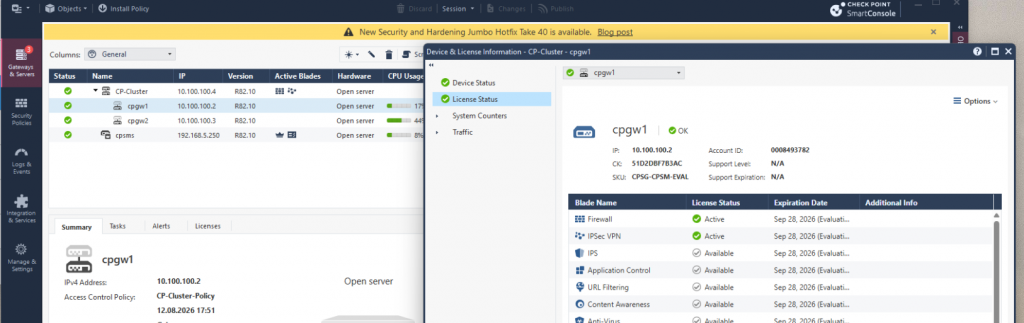
Clish/Bash CLI:
On the SMS and on each cluster member:
cplic print # Lists all licenses registered on that machine SKU, expiration, IP binding.The sms should its two attached management licenses, and cpgw1/cpgw2 each showing their own valid gateway container
license.
SMS:
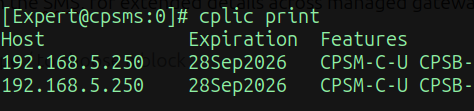
GW1:

GW2:

4. Conclusion
Licensing a Check Point environment correctly is one of those tasks that looks simple on paper but can quietly break a deployment if done in the wrong order or with the wrong license type. This article walks through licensing a common topology (with one Security Management Server (SMS) managing one cluster made of two gateway members) from requesting the licenses on the Check Point User Center, to attaching them via SmartUpdate, to verifying everything is healthy in SmartConsole and via CLI.
Quick Checklist Summary
- Generate central licenses using the SMS IP for both gateways User Center
- Download the two .lic files User Center
- Import both .lic files into the license repository SmartUpdate
- Attach each license to its matching gateway object (cpgw1 / cpgw2)
- Verify status = OK, correct blades, correct expiration SmartConsole + cplic print