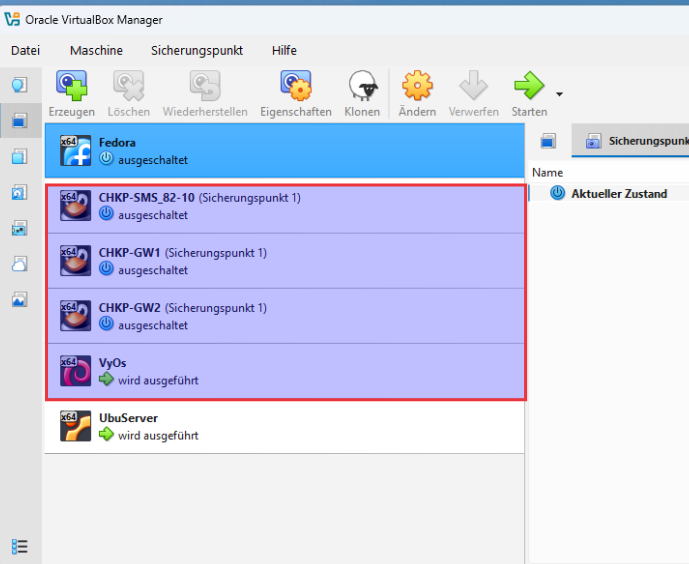
Getting the Images: VyOS and Gaia
Before any of the virtual machines in the diagram can be built, you need two categories of installation media: the VyOS image for the router, and the Check Point Gaia ISOs for the SMS and the two gateway/cluster members.
1. Downloading VyOS
VyOS is open source, and there are two tracks to choose from:
- Rolling release : free for anyone, published continuously with the latest features and fixes. This is the easiest option for a lab, since non-subscribers can access the source code for the rolling release, and prebuilt images are simply pulled from the project’s download endpoint.
- LTS release: the stable, CLI-frozen branch intended for production use. Subscribers can download the source code for the LTS release from the “Downloads” link, and prebuilt LTS images are made available to paying customers or active project contributors rather than the general public.
For a home lab like this one, the rolling release is normally the pragmatic choice:
- Go to the VyOS download page: https://vyos.net/get/nightly-builds/ and select the rolling release ISO for
amd64. - Rolling release builds include all the latest developments from maintainers and community contributors and, while there are no formal stability guarantees, images that fail basic boot and configuration tests are not published in the project’s own words, if it’s solid enough for customers running it in production, it’s certainly good enough for home and lab users.
- Verify the download’s signature if you want to follow best practice. VyOS images are signed, and starting with version 1.4.3 the project uses Minisign exclusively for signature verification.
2. Downloading the Check Point Gaia ISO
Check Point’s Gaia images (used for both the SMS and the Security Gateways) aren’t published as an open download — they’re distributed through the Check Point User Center / Support Center portal, gated behind an account and a license/evaluation entitlement.
- Create or log into a Check Point User Center account at
usercenter.checkpoint.com. A personal or company email is enough to register for evaluation purposes. - Download the Gaia ISO from the Support Center’s download section (
support.checkpoint.com), searching for the current release (e.g. an R82 “Gaia Clean Install” image). Check Point publishes separate combined images that let the first-time wizard choose the role — Security Management, Security Gateway, or Standalone, so the same ISO can be reused for all three VMs in this lab. - Verify the checksum of the downloaded ISO against the value published alongside it on the download page before attaching it to a VM Check Point publishes this specifically so the file’s integrity can be confirmed.
- Note that most of the software on the installation media is automatically enabled for a 15-day evaluation period out of the box, which is normally plenty of time to build and test a lab like this one.
With both images downloaded and verified, you’re ready to bring up the four VMs (VyOS router, SMS, and the two cluster gateways) and start the configuration described in the rest of this article.
3. Installing VyOS on VirtualBox
With the ISO in hand, the next step is building the actual VyOS VM. This is the router that will sit at the center of the lab, so it’s worth setting the networking up correctly from the start rather than patching it later.
3.1 Prepare the VirtualBox VM
- Open VirtualBox and click New.
- Give it a clear name (e.g.
vyos), set Type: Linux and Version: Debian (64-bit) — VyOS is Debian-based, so this gives sane defaults. - Allocate resources modestly: VyOS is lightweight, so 512 MB–1 GB of RAM and 1 vCPU is plenty for a lab router.
- Create a small virtual disk (2–4 GB is more than enough) — VyOS doesn’t need much space, even with multiple config revisions saved.
- Leave the rest of the wizard defaults as-is; you’ll adjust networking and storage in the VM’s Settings before first boot.
3.2 Assign the Network Interfaces
For the router to actually route between the outside world and the internal lab segments, it needs at least two adapters plugged into two different kinds of VirtualBox networks. Open the VM’s Settings > Network tab:
- Adapter 1 — Bridged Network. Set this to Bridged Adapter and select your host’s physical NIC. This is what gives VyOS’s ETH0 a real presence on the Home LAN (
192.168.6.0/24in the topology, or the192.168.5.0/24outside segment once addressed), letting it talk to devices outside the VirtualBox host, including the ISP-facing router. - Adapter 2 — Internal Network. Set this to Internal Network and give it a name, e.g.
OutsideLab(or whatever you’ll reuse across VMs). Internal Network mode means VirtualBox creates a private, host-isolated switch. Only VMs explicitly attached to that same named internal network can see each other, and the traffic never touches the physical host NIC or the internet. This is exactly the isolation you want for a segment like SIC, Sync, or Inside.
3.3 Attach the ISO Image
- Still in Settings, go to Storage.
- Select the empty optical drive under the storage controller (VirtualBox usually creates one by default).
- Click the disc icon and choose Choose a disk file…, then browse to the VyOS ISO downloaded in Section 3.1.
- Confirm the drive now shows the VyOS ISO attached, and make sure Boot Order (under System) has the optical drive ahead of the hard disk so it boots from the ISO first.
3.4 First Boot and Installation
- Start the VM. VirtualBox boots from the attached ISO into the VyOS live system.
- At the login prompt, sign in with the default live credentials: username
vyos, passwordvyos. - From the live shell, run the install command to lay VyOS down permanently on the virtual disk:
install image- The installer walks through a short set of prompts — confirm the target disk, accept the default partitioning for a lab, set a new root/admin password when asked, and confirm you want to proceed.
- Log in with the credentials set in step 4, and you now have a running VyOS instance ready for the interface and routing configuration described in Section 1.
- Once the install finishes, shut down the VM, remove the ISO from the virtual optical drive (Settings > Storage), and boot again — this time it should come up from the installed image on the virtual disk rather than the live ISO.
3.5 Configuration
# enter configuration mode
configure

# configure both interfaces
set interfaces ethernet eth0 address '192.168.6.199/24'
set interfaces ethernet eth0 description 'home-lan'

set interfaces ethernet eth0 address '192.168.5.199/24'
set interfaces ethernet eth0 description 'outsideLab'

# enable ssh
set service ssh port '22'
set service ssh listen-address '192.168.6.199

# set default route to isp router
set protocols static route 0.0.0.0/0 next-hop 192.168.6.1

# set nameservers
set system name-server 1.1.1.1
set system name-server 8.8.8.8

# save configuration
commit
save
show configuration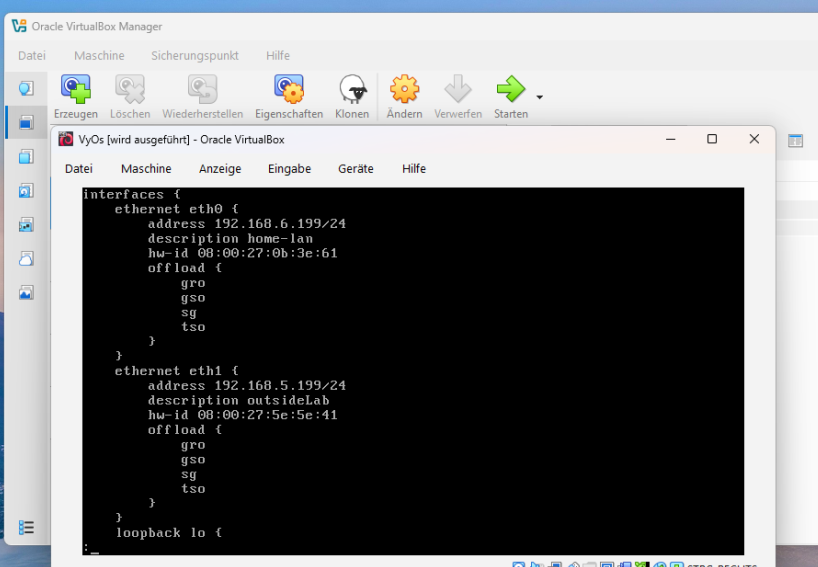
4. Installing the Security Management Server (SMS)
The SMS is the brain of the deployment. It’s where security policy is authored, logs are collected, and where administrators interact with SmartConsole. It does not sit inline with traffic; it lives off to the side on its own management segment.
In this topology, the SMS server sits at 10.100.100.101 on the SIC network. For management purposes in this lab I will use the Eth0 interface (192.168.5.250).
4.1 Prepare the VirtualBox VM
- Open VirtualBox and click New.
- Give it a clear name (e.g.
CHKP-SMS_82-10), set Type: Linux. Gaia is linux-based, so this gives sane defaults. - Allocate resources : Gaia needs around 8 GB of RAM and 8 vCPU for a usable lab management server.
- Create a consistent virtual disk (80–120 GB is enough)
- Leave the rest of the wizard defaults as-is; you’ll adjust networking and storage in the VM’s Settings before first boot.
4.2 Assign the Network Interfaces
For the server to actually route between the outside world and the internal lab segments, it needs at least two adapters plugged into two different kinds of VirtualBox networks. Open the VM’s Settings > Network tab:
- Adapter 1 — Internal Network. Set this to Internal Network and give it a name, e.g.
OutsideLab. - Adapter 2 — Internal Network. Set this to Internal Network and give it a name, e.g.
intnet-SIC-lab
4.3 Attach the ISO Image
- Still in Settings, go to Storage.
- Select the empty optical drive under the storage controller (VirtualBox usually creates one by default).
- Click the disc icon and choose Choose a disk file…, then browse to the Checkpoint Gaia ISO downloaded.
- Confirm the drive now shows the ISO attached, and make sure Boot Order (under System) has the optical drive ahead of the hard disk so it boots from the ISO first.
4.4 First Boot and Installation
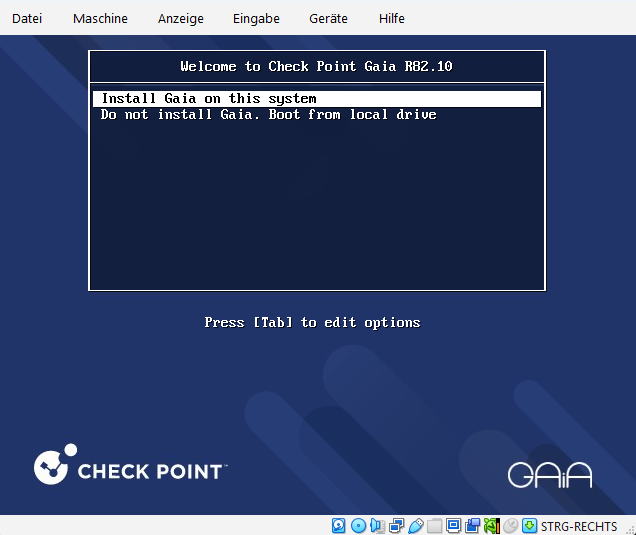
- Start the VM. VirtualBox boots from the attached ISO into the gaia live system.
- Proceed with the installation:
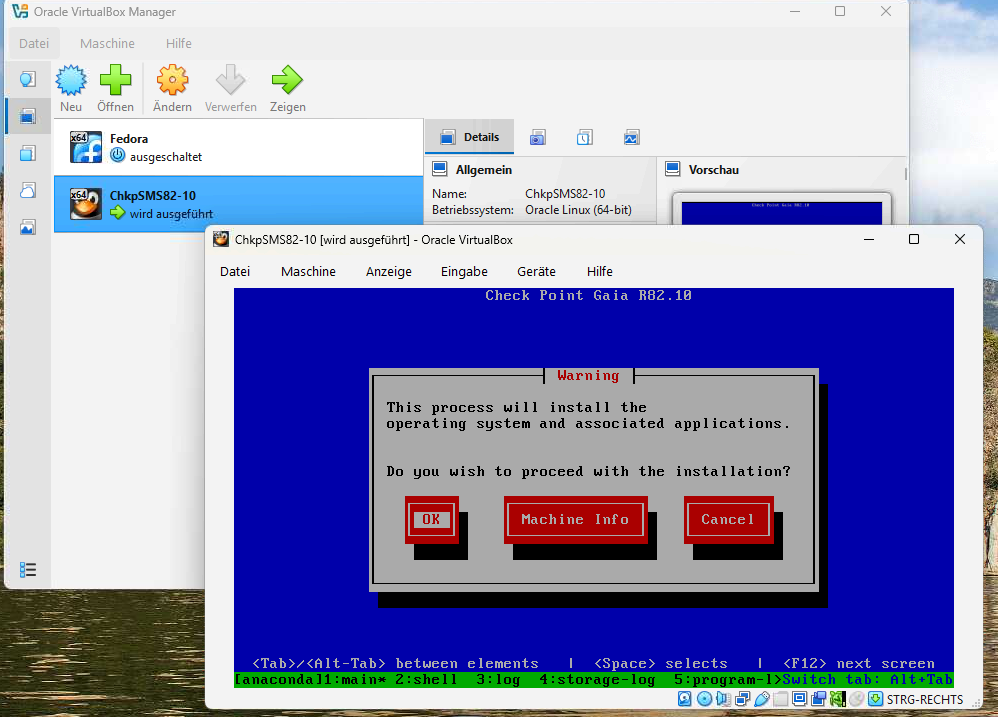
3. Select the default partition schema:
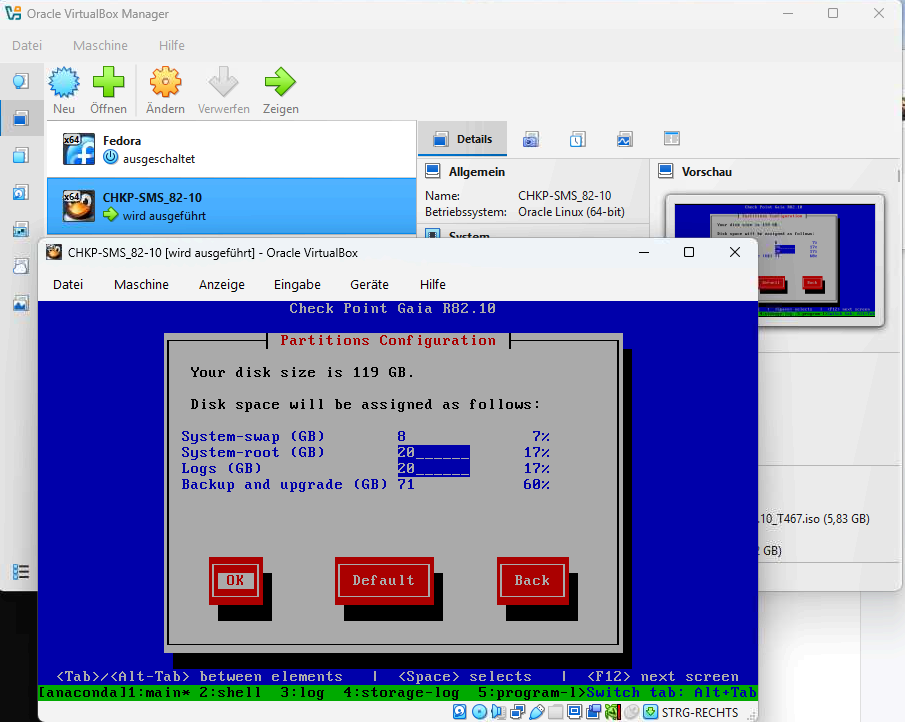
4. Configure the ETH0 interface for successive management:
IP: 192.168.5.250 // Subnet: 255.255.255.255 // Default gateway: 192.168.5.199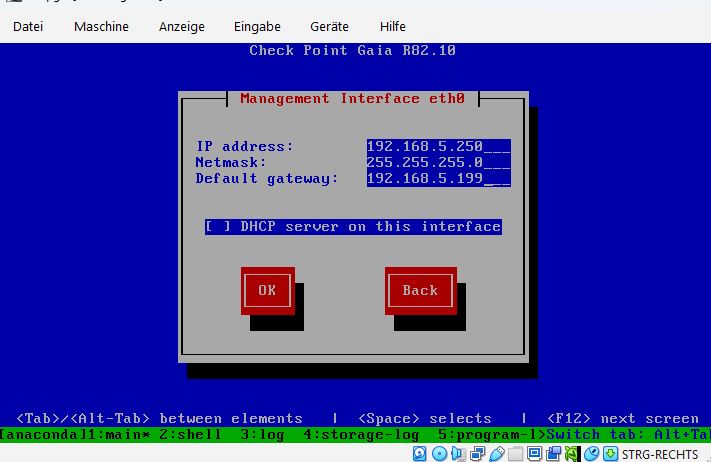
5. Set admin and root password.
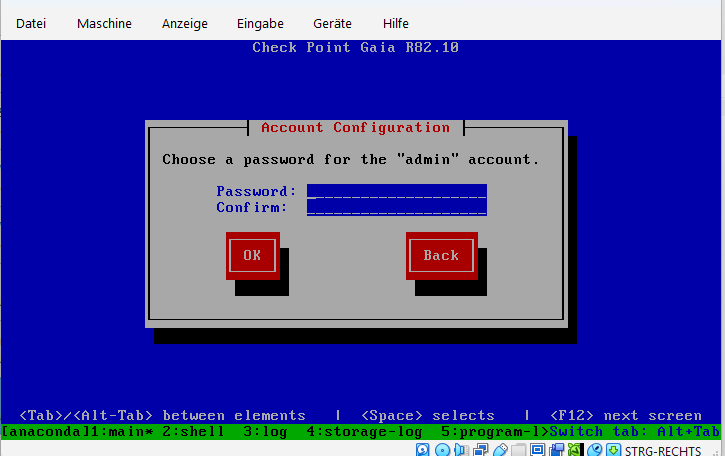
4.5 First-time Gaia configuration wizard
Once the installation is ready, you must reboot the nva and remove the iso image. After the first login, it will invite you to finish the first time wizard configuration.
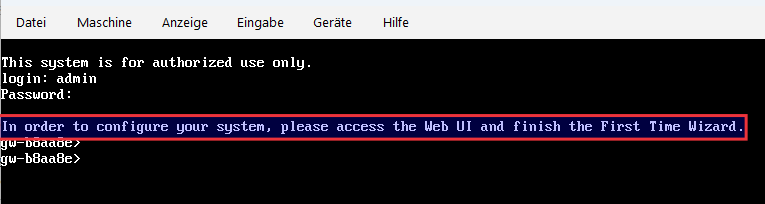
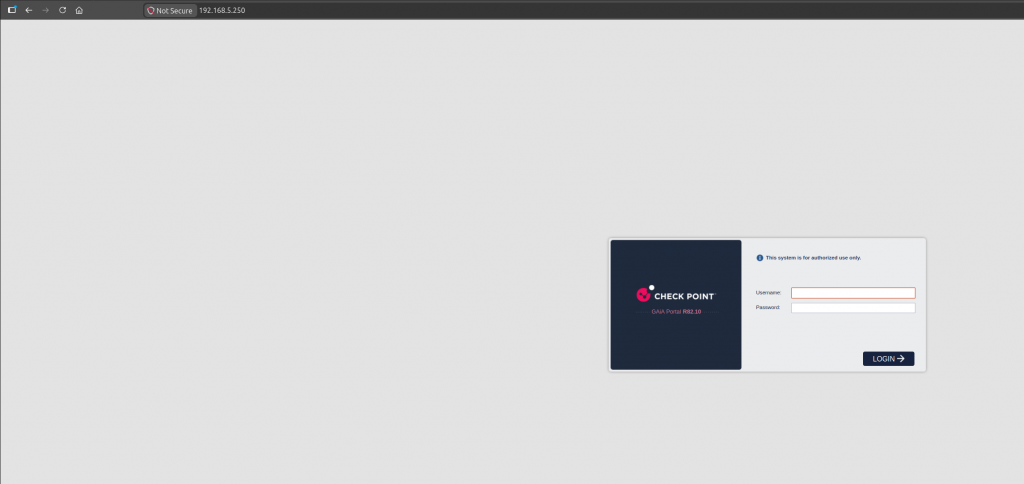
Next, access to the Gaia Web portal (https://10.250.5.250) and set the hostname, SIC interface IP (10.100.100.101/24 ), DNS, and NTP. Let others parameters as default:
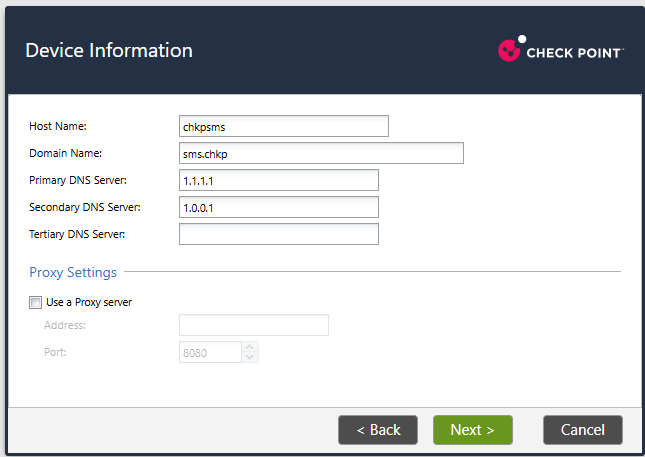
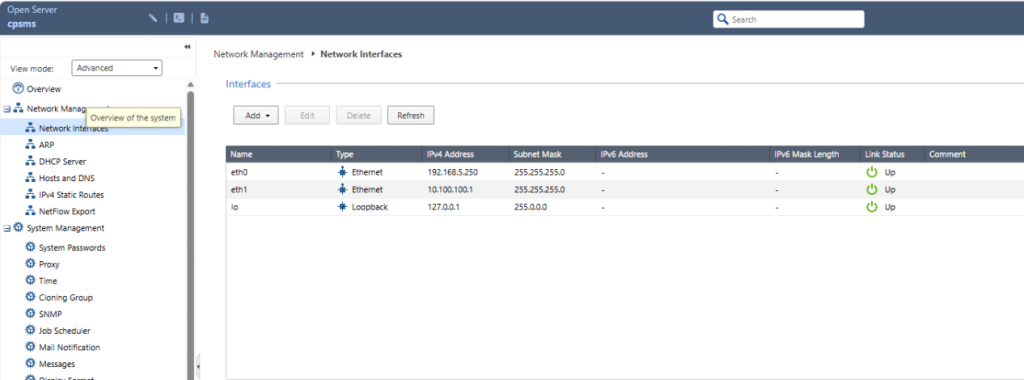
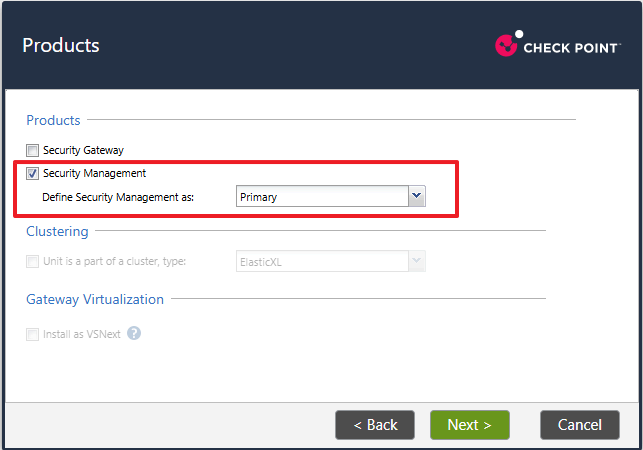
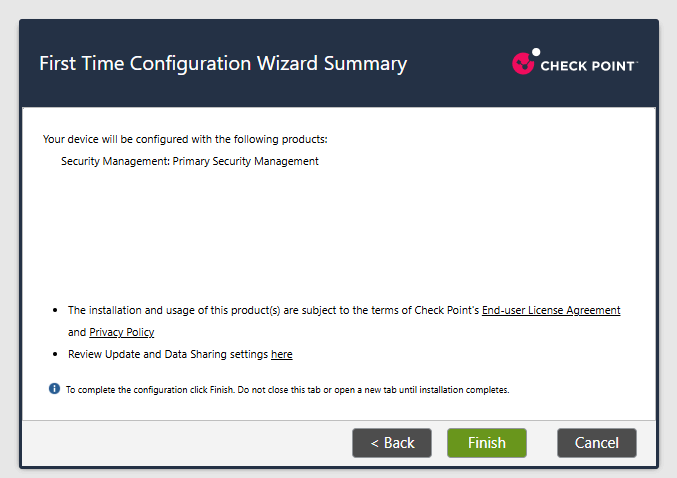
Just before finish the installation, choose the deployment type. Select Security Management only (not a combined “Management + Gateway” standalone box), since in this lab the SMS is a dedicated node
Complete the wizard installation:
5. Installing the Security Gateways (the Cluster Members)
The two gateway nodes in this lab form a ClusterXL high-availability pair — shown in the diagram as the “CP-Cluster” with two firewall members. Each one is a full Security Gateway; together they present a single virtual IP to the networks around them so that if one fails, the other takes over transparently.
5.1 Prepare the VirtualBox VM
For each gateway VM:
Same steps above (4.1, 4.2 and 4.3). The main differences are:
A) Enable four Network Interfaces in Virtualbox:
Adapter 1 — Internal Network. Set this to Internal Network and give it a name, e.g. OutsideLab.
Adapter 2 — Internal Network. Set this to Internal Network and give it a name, e.g. intnet-SIC-lab
Adapter 3 — Internal Network. Set this to Internal Network and give it a name, e.g. intnet-Sync-lab
Adapter 4 — Internal Network. Set this to Internal Network and give it a name, e.g. InsideLab
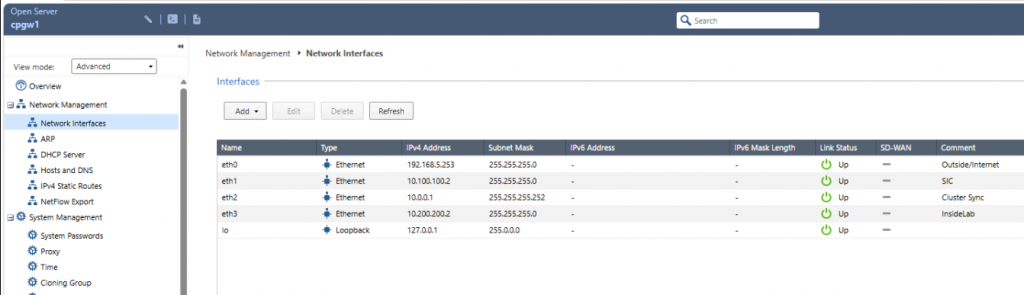
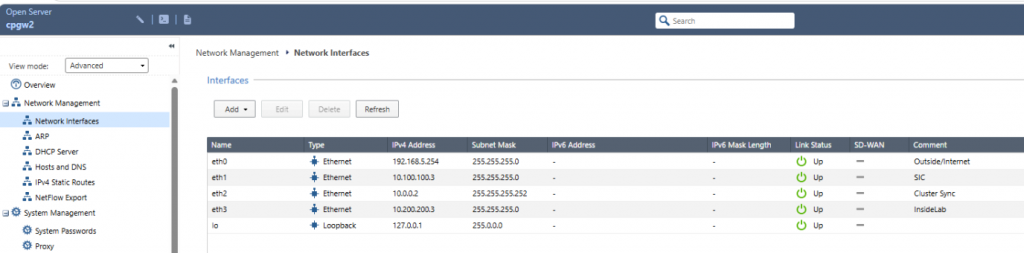
B) During the installation (step 4.4) assign the respective eth0 interface IPs (e.g 192.168.5.253 and 254 // Subnet: 255.255.255.255 // Default gateway: 192.168.5.199).
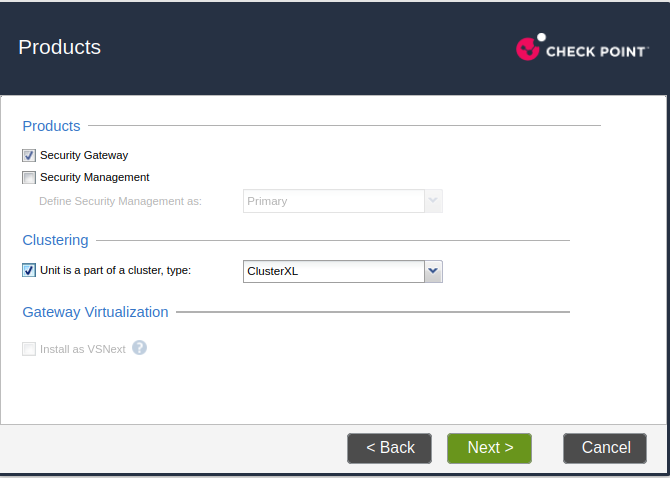
C) To complete the installation over the First-time Gaia configuration wizard: configure the rest of the interfaces and in the product section select Security Gateway and Enable ClusterXL.
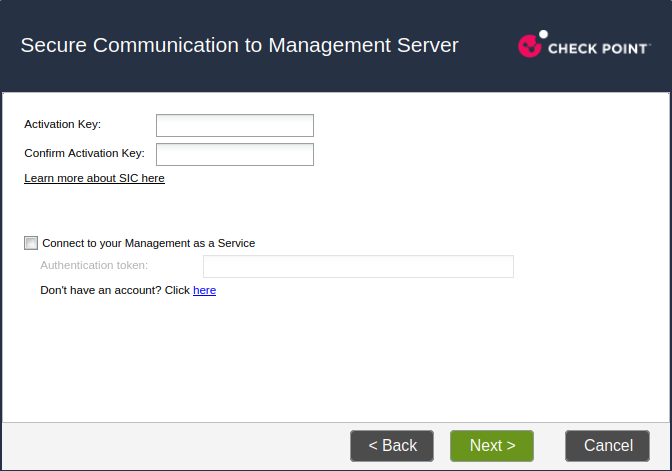
D) Set the Secure Internal Communication key:
6. Complete lab environment