
Introduction
A Policy Package is the container installed on a gateway or cluster. Inside a package there are one or more Layers (Access Control, NAT, Threat Prevention, etc.), and each layer has its own rulebase. A cluster object gets one policy package installed on it and that package’s layers are what actually get enforced.
Create a dedicated Policy Package for the Cluster
To create a dedicated package, click in the left menu and select “Manage Policies and layers” and choose ‘New Policy…’. Give it a clear name (e.g. ‘CP-Cluster-Policy’):
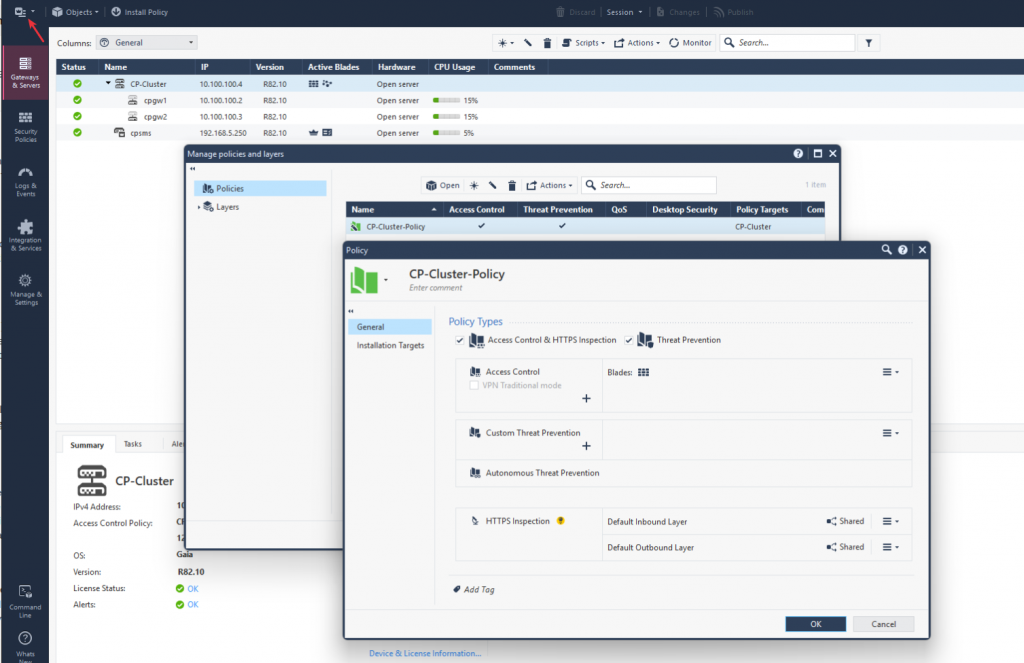
Choose which layers to include when creating the package, select the layer types it should contain (Access Control, Threat Prevention, NAT, etc.). Access Control is mandatory; the others are optional depending on what the cluster needs to enforce.
Next, click Install Policy (top right or via Security Policies view). In the install dialog, select your cluster object as the installation target (not the individual member gateways), then confirm. SmartConsole will validate and push the policy to both cluster members.
Build the Access Control Policy
The Access Control Policy Actually Is a firewall controls access to computers, clients, servers, and applications through a set of rules that make up an Access Control Rule Base. This policy is created and implemented directly in that Rule Base. Each rule matches traffic by source, destination, service/port, and (optionally) application, user identity, or time and applies an action such as Accept, Drop, or Reject.
If traffic doesn’t match any rule you’ve written, it falls through to the Implicit Cleanup Rule, the default rule that is applied if none of the rules in the Policy Layer match
The First Two Rules You Should Write:
1. The Stealth Rule
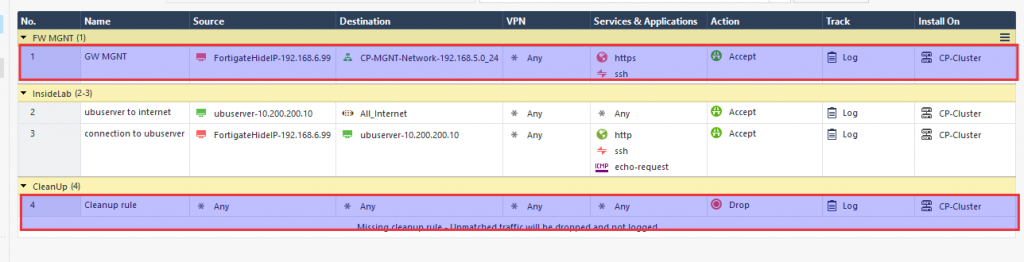
Placed near the top of the policy, this rule explicitly drops (and typically logs) any traffic whose destination is the gateway or cluster object itself, from anything other than your management/admin. On this Lab, the management/admin Network is located behind a Fortigate network appliance.
2. The Cleanup Rule
Placed at the very bottom, this rule matches “any/any/any” and drops everything, with logging enabled. Technically this duplicates what the Implicit Cleanup Rule already does — if you delete the explicit Cleanup rule, there will still be an implicit drop rule that drops all unmatched traffic, but that implicit rule does not create log entries. If you want visibility into what’s being blocked, you need an explicit Cleanup rule that logs.
Building Out the Rest of the Rule Base
Once Stealth and Cleanup are in place, add the real access rules between them. In my lab, the cluster’s inside interface faces a small 10.200.200.0/24 network where I run an Ubuntu web server as a VirtualBox guest. So the “InsideLab” rules are what actually let traffic reach and leave that server.
I grouped them under an InsideLab section with two rules:
- ubuserver to internet – Accept, Any service, source
ubuserver-10.200.200.10, destinationAll_Internet. This lets the web server itself reach out (updates, package installs, outbound checks) without restricting it to a specific port while I’m still testing. - connection to ubuserver – Accept, source is the lab client (
FortigateHideIP-192.168.6.99), destinationubuserver-10.200.200.10, services HTTP, SSH, and ICMP echo-request. This is the rule that actually matters for the article: it opens exactly the three things I need from the private network: a web request to test the server, SSH to manage it, and ping to confirm reachability.
Both rules sit below the management rule and above the Cleanup rule, and like every rule in this policy they are installed on the CP-Cluster object, so both cluster members enforce them identically.
Test the connection to the Web server
With the policy installed, I validated each piece of the “connection to ubuserver” rule from the client machine in my private network:
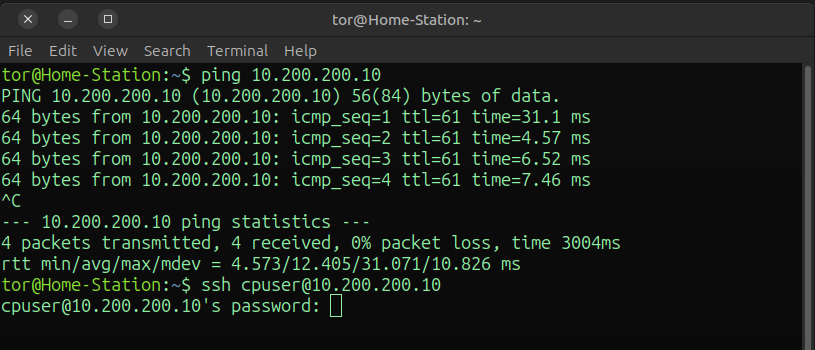
- ICMP –
ping 10.200.200.10to confirm basic reachability through the cluster. - HTTP – Browsed to
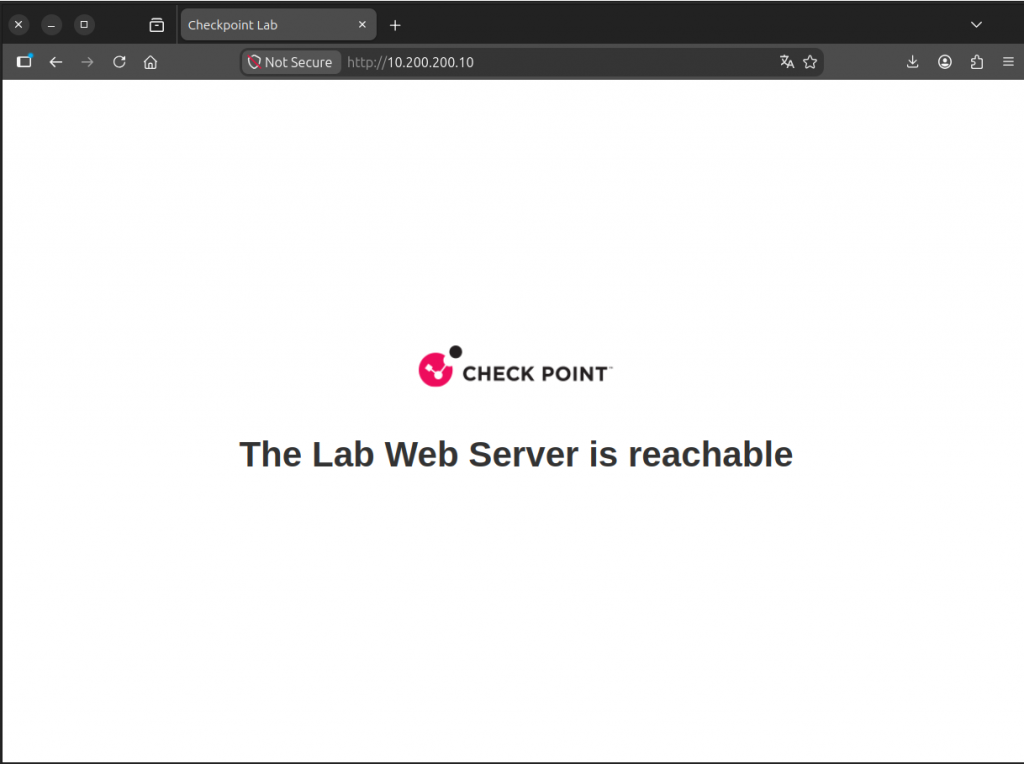
http://10.200.200.10and confirmed the Ubuntu web server’s default page loaded, proving port 80 traffic is passing and being matched by the rule (visible in SmartConsole’s Logs & Monitor view). - SSH –
ssh <user>@10.200.200.10to confirm management access to the server itself works through the gateway.
Visualize logs from Logs and events
Each of these should show up as a separate log entry against rule 3 (“connection to ubuserver”) and that’s the quickest way to confirm the rule is matching the traffic you intended, and not falling through by accident.
