
This tutorial walks through the complete process of creating a basic portable web container image using NGINX and Docker, starting from a Windows 11 laptop. The final image serves a static Hello World web page and is compatible with local Docker or Docker Compose.
The goal is to understand the fundamentals rather than deploy a complex application. In addition understanding how to construct a container image from the ground up provides invaluable insights into how containerization actually works.
This tutorial uses a fixed TCP port (80) to keep the configuration simple. Cloud platforms such as Azure Web App may require dynamic port handling, which will be covered in a follow-up tutorial.”
Prerequisites
Before you start, ensure you have:
- Windows 11
- Docker Desktop installed
- WSL 2 backend enabled (a Microsoft technology for running a real Linux kernel and distributions directly on Windows)
- A text editor (VS Code recommended)
- Basic familiarity with command-line operations
No Linux installation or virtual machines are required.
Project Structure
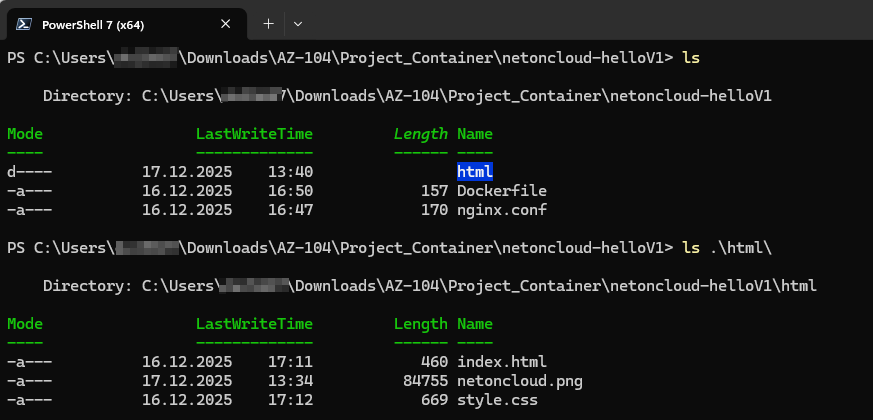
Create a project directory on your Windows system with the following structure:
netoncloud-hello/
├── Dockerfile
├── nginx.conf
└── html/
    ├── index.html
    ├── style.css
    └── netoncloud.png
All files are created locally on Windows. Docker will copy them into the container during the build phase.
If you prefer you can download the entire project directory from my GitHub repository: https://github.com/az104tor/containers/blob/main/netoncloud-helloV1.tar.gz However, for learning purposes, I recommend creating each file manually and eventually personalizing it.
Step 1 – Create the Web Page
index.html
<!DOCTYPE html>
<html lang="en">
<head>
    <meta charset="UTF-8">
    <title>NetonCloud | Hello World</title>
    <link rel="stylesheet" href="style.css">
</head>
<body>
    <div class="container">
        <img src="netoncloud.png" alt="NetonCloud Logo" class="logo">
        <h1>Hello World</h1>
        <p>Your containerized website is running successfully.</p>
        <span class="brand">netoncloud.com</span>
    </div>
</body>
</html>
style.css
body {
    margin: 0;
    font-family: -apple-system, BlinkMacSystemFont, "Segoe UI", Roboto, Arial, sans-serif;
    background: #0f172a;
    color: #e5e7eb;
    display: flex;
    justify-content: center;
    align-items: center;
    height: 100vh;
}

.container {
    text-align: center;
    padding: 3rem;
    border-radius: 12px;
    background: #020617;
    box-shadow: 0 10px 30px rgba(0,0,0,0.6);
}

h1 {
    font-size: 3rem;
    margin-bottom: 1rem;
    color: #38bdf8;
}

.logo {
    max-width: 320px;
    margin-bottom: 2rem;
}

.brand {
    margin-top: 2rem;
    display: block;
    font-size: 0.9rem;
    opacity: 0.7;
}

Download and place the logo image (netoncloud.png) inside the html/ directory.
Step 2 – NGINX Configuration (Static Port 80)
nginx.conf
server {
    listen 80;
    server_name _;

    root /usr/share/nginx/html;
    index index.html;

    location / {
        try_files $uri $uri/ =404;
    }
}
This configuration allows the same image to run locally and in Azure without modification.
Step 3 – Dockerfile
The Dockerfile (a text file content the instructions) builds the container image and configures NGINX to serve static content on port 80.
FROM nginx:stable-alpine
RUN rm /etc/nginx/conf.d/default.conf
COPY nginx.conf /etc/nginx/conf.d/default.conf
COPY html/ /usr/share/nginx/html/
EXPOSE 80
Key points:
- Uses a lightweight Alpine-based NGINX image
- Runs NGINX in the foreground (required for containers)
- Injects the runtime port 80
Step 4 – Build and Run
Navigate to the the local project directory. You should be able to find the same files and folder (html):
Now, you can build build the docker image:
docker build -t netoncloud-hello .List your local docker images to find it:
docker images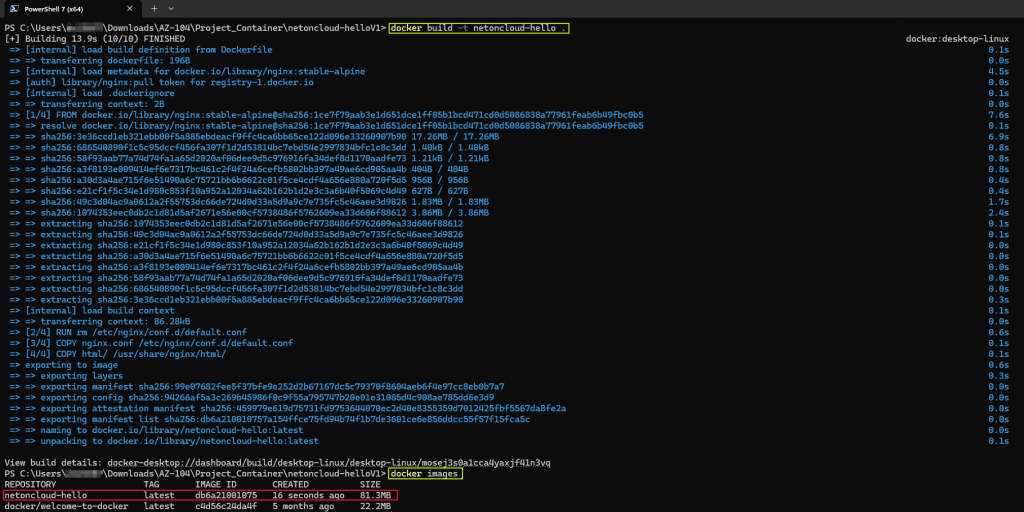
In order to identify different versions or variants of an image it is a good practice to tag it. Tags allow you to version your container images, making it easy to track which version of your application is running in any given environment, especially before push them in repository like docker hub or azure container registry.
docker tag netoncloud-hello netoncloud/hwnoc:v1
At this stage, you can run the container image locally using Docker. You are able to chose the local TCP Port (– p) where your container will listen for http connection:
docker run -it -p 8080:80 netoncloud/hwnoc:v1For testing purposes, I ran the container with the option -it (interactive and terminal). You can also ruin it with -d (in background). Explore all the options with docker run –help
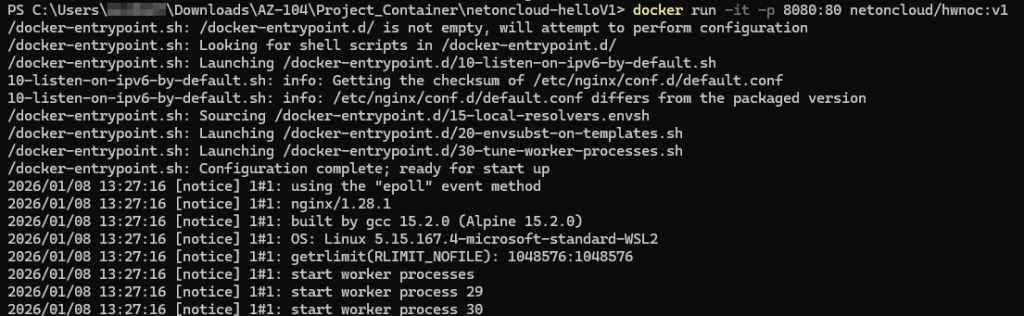
Once the container is up and running, as first step I recommend to check if your operating system TCP/IP stack is listening on the above specified TCP Port: 8080 in all the network interfaces.
From a separate PowerShell run the command:
netstat -an | Select-String 0.0.0.0:8080
Finally, try to connect to the running container instance from your favorite internet browser:
http://localhost:8080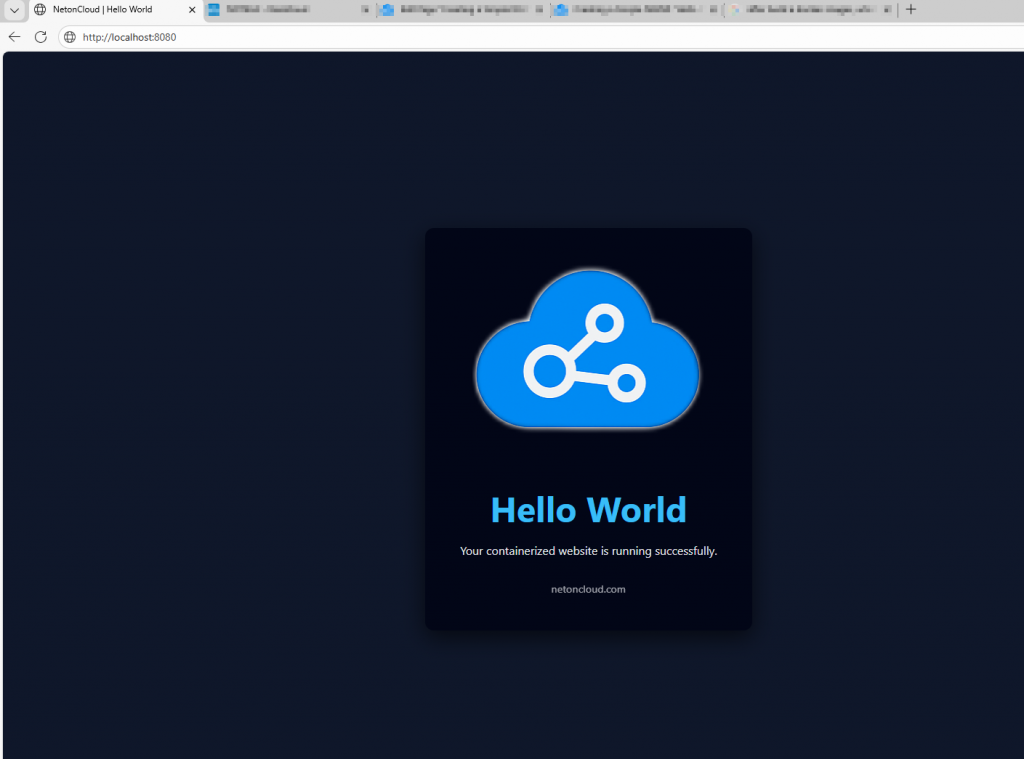
Step 5 – Logs and Monitoring
Check all the active containers running on your local docker:
docker ps
A very useful parameter for further operations is the “CONTAINER ID“. It referred the running instance of a container image as it is possible to run many separate instance of the same docker image (you must only use a different local TCP port like 8081, 8082 etc..).
Example to running more container together:
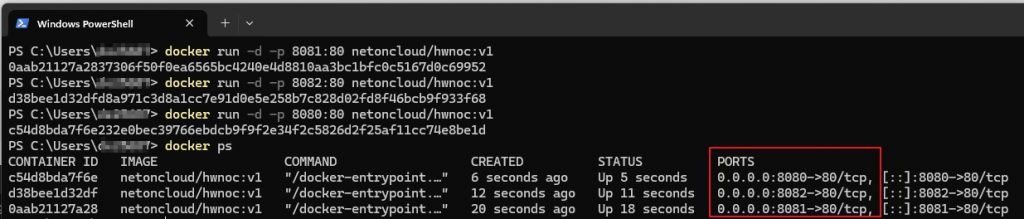
For a live logging run the below command (the first three container ID alphanumeric characters are enough)
docker logs abb #referred to my first running container aboveDocker tracks all the events related to the running container, inclusive the network traffic over the HTTP protocol:

to monitoring metrics ( cpu, ram, etc..) you can run the command:
docker stats container iD #change container ID with yoursto display the running processes of a specific container:
docker top container iD #change container ID with yoursConclusion. Why This Image Works for Learning
Throughout this tutorial, we walked through the process of building a container image from scratch. You could start to learn how to build custom container images tailored to your specific needs and the possibility how to monitoring them in order to understanding what exactly happens when an image container is running.

Author Biography
“I am an experienced Network and Cloud Administrator, specializing in the design and operation of secure, high-availability infrastructures. With professional certifications in Cisco Switching and Routing (CCNA, CCNP) and Check Point Firewall Administration (CCSA), I bring in-depth expertise in network security and SAP connectivity solutions for customers and partners over dedicated VPN tunnels.
I am skilled in managing hybrid cloud environments, firewall policies, routing technologies, and SAP network infrastructure. I have developed strong analytical skills in troubleshooting and supporting organizational IT growth on a global scale. I am currently employed by a leading Japanese multinational in the IT and telecommunications industry.”